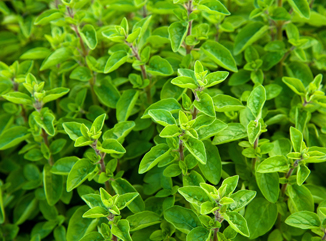
Sowing and Caring for Marjoram (Origanum majorana)
Marjoram is an aromatic herb commonly used in cooking, known for its spicy flavor. Sowing and caring for marjoram is relatively easy if you follow a few key steps. Here’s a detailed guide:
1. Sowing Time
- Indoor Sowing: From March to April is a good time to start sowing marjoram seeds indoors.
- Outdoor Sowing: From mid-May, when there’s no risk of frost, the plants can be moved outside, or seeds can be sown directly in the ground.
2. Choosing the Right Location
- Light: Marjoram loves sunny locations. It should receive at least 6 hours of direct sunlight each day.
- Soil: The soil should be well-drained, nutrient-rich, and loose. A sandy-loamy soil with a pH level of 6 to 7 is ideal.
- Pot Cultivation: Marjoram can also be easily grown in pots on a sunny balcony or windowsill.
3. Sowing
- Pre-cultivation: When pre-sowing indoors, scatter the seeds lightly over the surface of fine seed compost. The seeds are light germinators, so they should be pressed down slightly but not covered with soil.
- Spacing: When sowing directly outdoors or in pots, leave about 20-30 cm between the plants.
- Germination Temperature: A temperature of about 18–22°C is ideal for germination. Cover the seeds lightly with plastic wrap to maintain humidity.
- Germination Time: The seeds will germinate in about 10–14 days.
4. Care After Sowing
- Watering: Keep the soil evenly moist during germination, but avoid overwatering to prevent waterlogging. Marjoram is sensitive to excess moisture.
- Ventilation: If plants are started indoors, they should be gradually acclimatized to outdoor temperatures after germination (hardening off).
- Pricking Out: Once the seedlings are big enough, they should be pricked out (thinned) to allow the roots to develop well.
5. Transplanting to the Garden
- Time: Once there’s no risk of frost (usually from mid-May), the young plants can be transplanted outdoors.
- Plant Spacing: Space the plants about 25 cm apart.
- Preparing the Soil: Loosen the soil well and mix in some compost or organic fertilizer to enrich it.
6. Care During Growth
- Watering: Marjoram needs moderate watering. Avoid waterlogging, as the plant is sensitive to too much moisture. Water regularly but sparingly.
- Fertilizing: Fertilizing is not necessary if the soil is nutrient-rich. If the soil is poor, you can apply organic fertilizer or compost every 4-6 weeks.
- Weeding: Regularly remove weeds to ensure the marjoram plants have enough space and nutrients.
- Pruning: Regularly trimming the leaves encourages bushier growth and prevents the plants from becoming too tall and unstable.
7. Harvesting
- Timing: Marjoram can be harvested throughout the growing season, but the best time is just before flowering when the flavor is most intense.
- Harvest Method: Use scissors to cut the tips of the stems when the plant is about 10-15 cm tall. Leave about 5 cm to encourage regrowth.
- Drying: To preserve marjoram, cut the stems and hang them upside down in a shady, well-ventilated place to dry.
8. Overwintering
- Outdoors: Marjoram is not winter-hardy, so it should be brought indoors before the first frost or replaced by new plants the following year.
- In Pots: If grown in pots, marjoram can be brought indoors in the fall and placed in a bright, cool spot. Water sparingly during the winter months.
9. Pests and Diseases
- Pests: Marjoram is relatively resistant to pests. Occasionally, aphids or spider mites may appear, but they can usually be removed with a water spray or natural pest control methods.
- Diseases: Waterlogging can lead to root rot, so good drainage is essential.
10. Care Tips
- Regular Pruning: Not only promotes growth but also delays flowering and ensures a longer harvest period.
- Mulching: A light layer of mulch can help retain moisture in the soil and suppress weeds.
- Drying: Harvested marjoram should be dried quickly in a shady and well-ventilated area to preserve its essential oils.
With this guide, you’ll be able to grow marjoram successfully and enjoy a bountiful harvest.